Wireguard and NextCloud

Synchronizing, saving, and sharing data, emails, and contacts under our control based on open-source software? Securely accessing our home network from everywhere in the world based on the most modern Virtual private Network technology? With just a Raspberry Pi? Yes, we want it! Today we will install NextCloud and Wireguard on our Raspberry Pi and make it work together.
You will save a lot of time using the tricks presented in the next few minutes. And we will use IOTstack.
First we have to install Raspberry OS on an SSD and udate it as usual.
Next we install IOTstack with this command:
git clone https://github.com/SensorsIot/IOTstack.git IOTstack
cd IOTstack
Now we install Docker using the menu of IOTstack
./menu.sh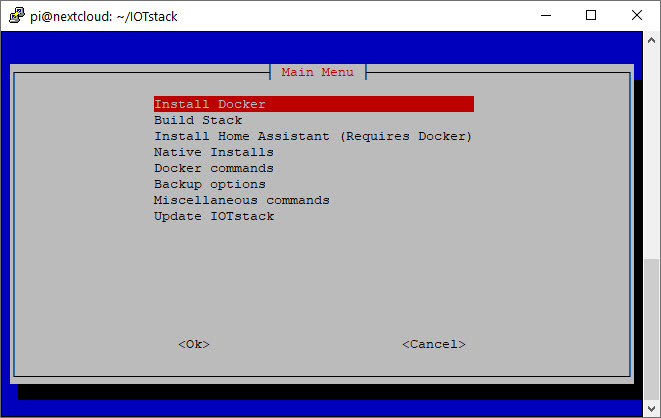
Next create compose-override.yml and copy-paste the content from Google drive: https://drive.google.com/file/d/1ja5Gzzwhkfz2IMq4nHFjsefGJe4nGBTj/view?usp=sharing
nano compose-override.ymlThis file will be merged every time you start menu.sh. So make sure to restart menu.sh every time you change this compose-override.yml.
Customize Wireguard
•Add a domain in duckDNS
Go to https://www.duckdns.org/ and create a domain.
Next we have to add the token and the domain in file duck.sh
nano ~/IOTstack/duck/duck.sh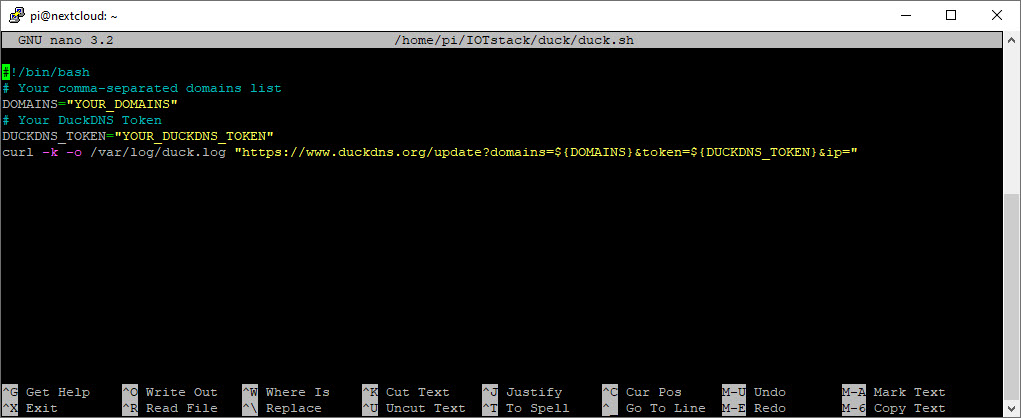
Next we have to schedule a task to call DuckDNS
crontab -eAdd this line at the bottom of the file:
*/5 * * * * sudo ~/IOTstack/duck/duck.sh >/dev/null 2>&1
Now you have to foreward port 51820 for UDP:

Now you can test the script to make sure it workssudo ~/IOTstack/duck/duck.sh then cat /var/log/duck.log. If you get KO then something has gone wrong and you should check out your settings in the script.
Add url to compose-override.yml
nano compose-override.yml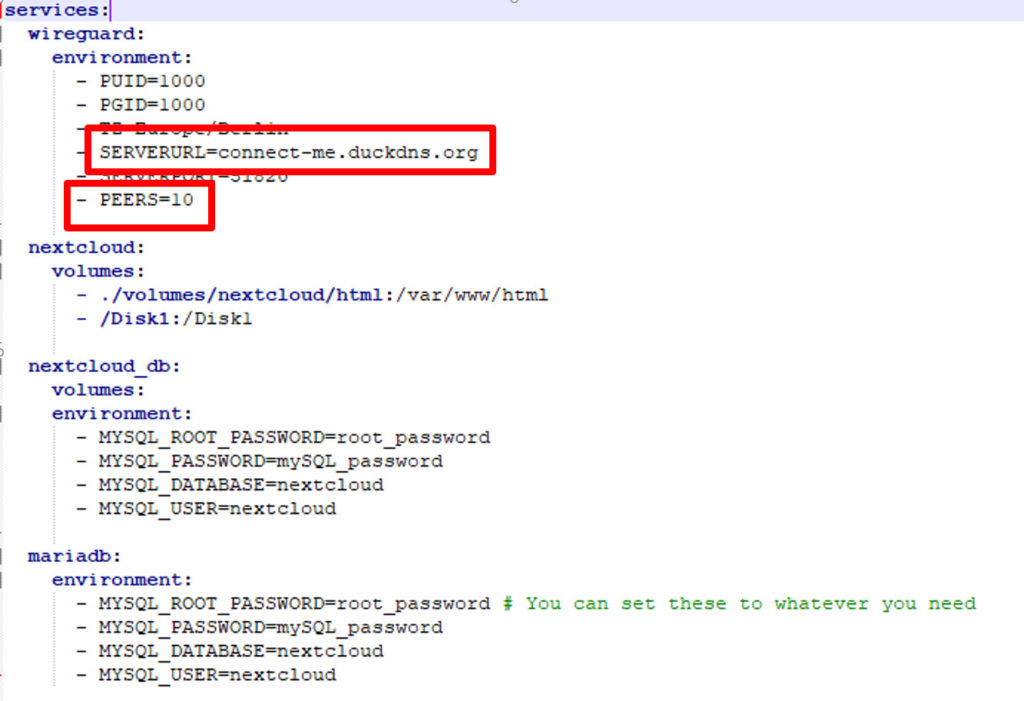
Decide how many “tunnels” you need and adjust the “PEERS” parameter.
If you build now a stack using menu.sh with at least Wireguard ticked your Wireguard server should run.
Add Wireguard client on Smartphone or PC
Now you can install the Smartphone app on Android or IOS and to create a tunnel for each device.
Display the respective .png file in directory :~/IOTstack/services/wireguard/config/peerXXX and add a tunnel with your Smartphone camera.
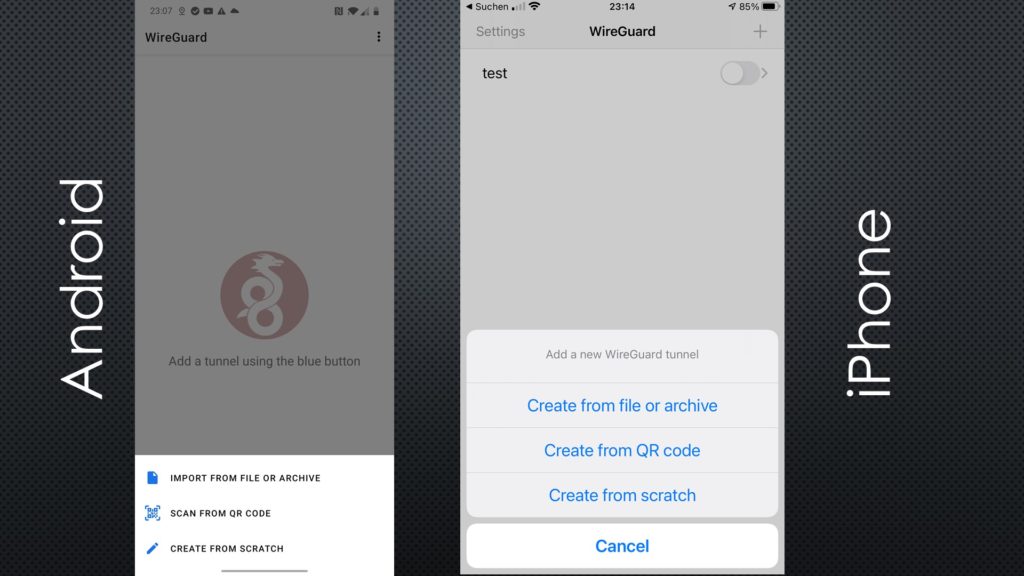
If you switch your tunnel on, you should be connected to your home network.
Install NextCloud
We have to change the passwords in compose-override.yaml. You can leave them for a test. They have to match as in the example below.
nano compose-override.yml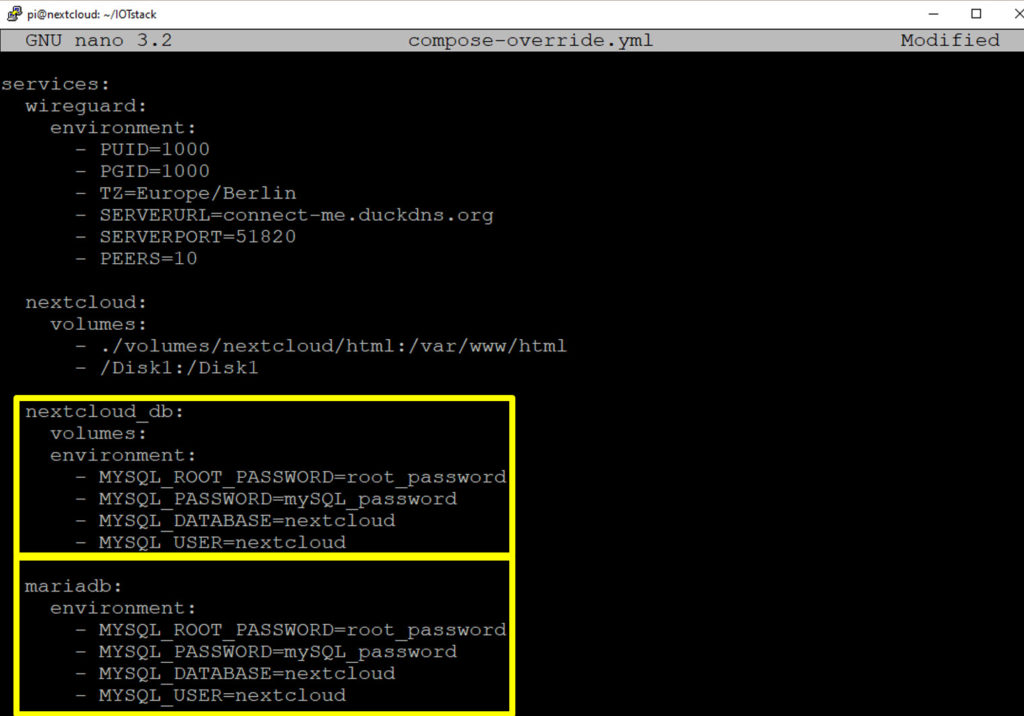
Now we can build the final docker-compose.yml file using
./menu.sh tick at least Portainer-CE (the new community edition of Portainer), MariaDB, Nextcloud, and Wireguard. Of course you can select additional containers if needed.
If we start docker again, also nextCloud should run on the server and we can configure it using the browser. NexCloud answers on port 9321:
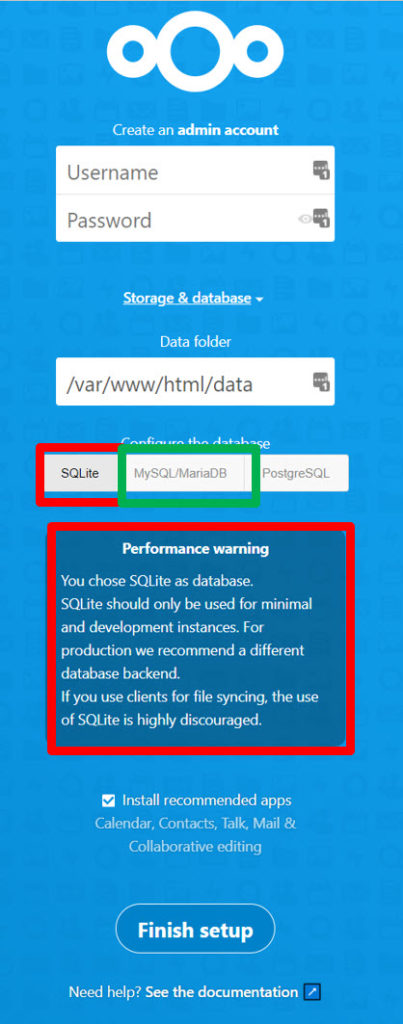
Becasue we use the recommended MariaDB we have to enter the names and credentials:
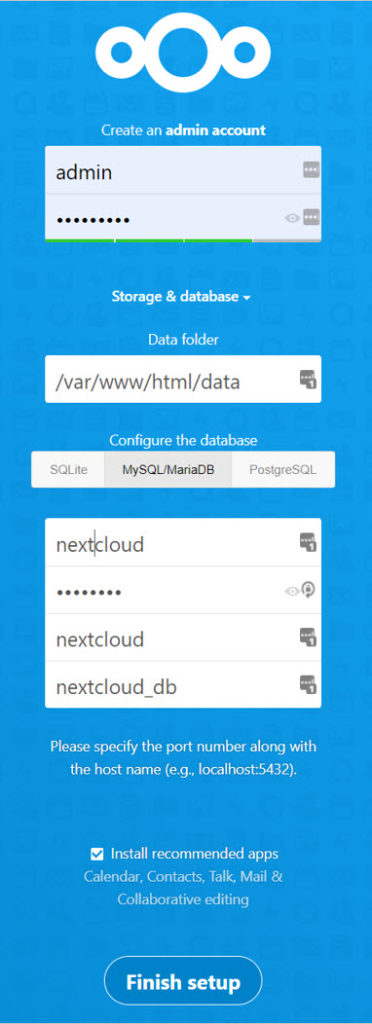
The password comes from MYSQL_PASSWORD in compose-override.yml
Add a data disk to NextCloud
You have to add this line to override-compose.yml
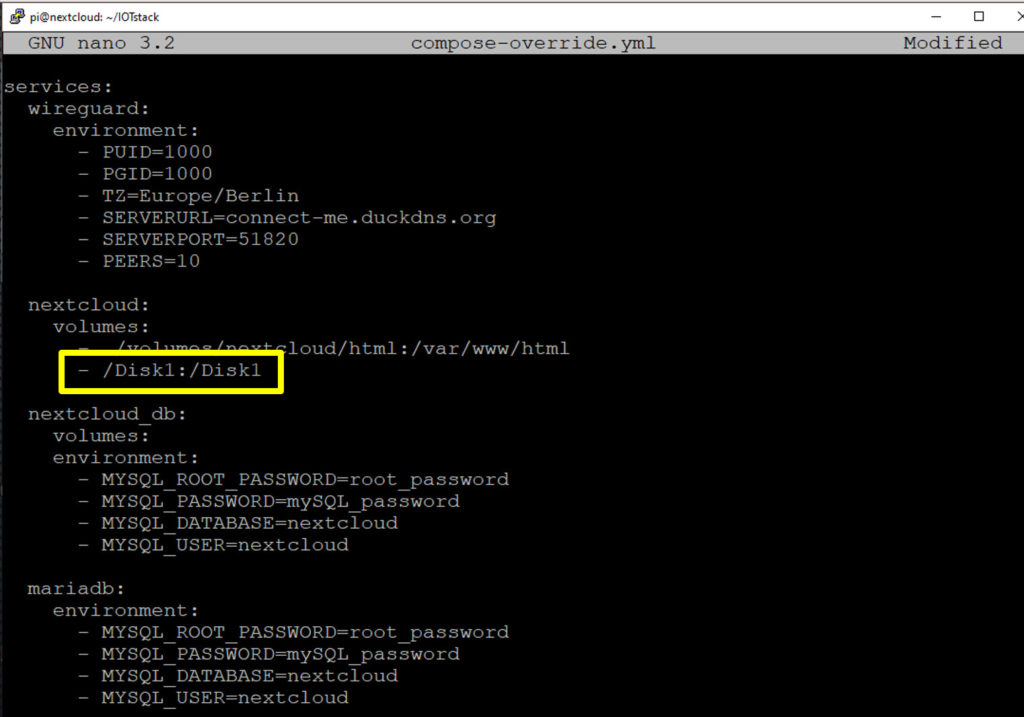
and mount a disk. I use gparted on the Raspberry desktop to format a disk using ext4.
Next mount the disk by creating a directory:
mkdir /Disk1Now you have to find out the PARTUUID of your new disk:
sudo blkid
And add a line into fstab
sudo nano /etc/fstab
PARTUUID=dab6f534-01 dev/Disk1           ext4    defaults,auto,users,rw,nofail 0 0
Now the disk should be mounted after the next reboot. Just add the owner and the permissions:
sudo chown -R www-data:www-data /Disk1
sudo chmod -R 0750 /Disk1
And you should be ready to go
Start your Stack
Now you can re-run the ./menu.sh and start docker.
./menu.sh
docker-compose -f docker-compose.yml up -d
If you go to port 9002 of your Raspberry you should see Portainer.


